
Ever since visiting Portugal 7 years ago I’ve obtained two new loves in my life. The first is Portugal itself, my favorite country. The second is the Pasteis de Nata. A Pasteis de Nata is a Portuguese custard tart, a creamy and sweet lemony custard filling in a crispy and delicate pastry shell. These are found at almost every single bakery in Portugal and they truly are my definition of heaven.
There are a few places here in Victoria that sell these tarts but they taste nothing like they do in Portugal so I wanted to try to make them for myself but I’ve always been deterred by my dislike for baking. I’m a cook not a baker. Anyways this past weekend was a long weekend so time to face my fears. I head out to the store to purchase a spiffy new muffin pan and I crack open my Portuguese recipe book. This recipe involved some combination of butter, flour, and water mixed together and placed in the tins. Luckily I did a test first and cooked one of the pastry shells because the dough was totally wrong. It was more of a shortbread texture (similar to a Chinese egg tart) rather than a Pasteis de Nata. Back to the drawing board. Day 2 I look to the internet for a different recipe and stumble upon this one….
http://leitesculinaria.com/7759/recipes-portuguese-custard-tarts-pasteis-de-nata.html
I’ve added some notes in blue below.
Ingredients
For the dough
- 2 cups minus 2 tablespoons all-purpose flour
- 1/4 teaspoon sea salt
- 3/4 cup plus two tablespoons water
- 16 tablespoons unsalted butter, room temperature, stirred until smooth
For the custard
- 3 tablespoons all-purpose flour
- 1 1/4 cups milk, divided
- 1 1/3 cups granulated sugar
- 1 cinnamon stick
- 2/3 cup water
- 1/2 teaspoon pure vanilla extract
- 6 large egg yolks, whisked
- Powdered sugar
- Cinnamon
Directions
1. In a stand mixer fitted with a dough hook, mix the flour, salt, and water until a soft, pillowy dough forms that cleans the side of the bowl, about 30 seconds.
2. Generously flour a work surface and pat the dough into a 6-inch square using a pastry scraper as a guide. Flour the dough, cover with plastic wrap, and let it rest for 15 minutes.
3. For this part lay long sheets of plastic wrap down on your rolling surface then roll out your dough on top of it. I can’t imagine not using the plastic wrap it would have been a nightmare to peel the dough off the counter. Roll the dough into an 18-inch square. As you work, use the scraper to lift the dough to make sure the underside isn’t sticking.
4. Brush excess flour off the top, trim any uneven edges, and using a small offset spatula dot and then spread the left two-thirds of the dough with a little less than one-third of the butter to within 1 inch of the edge. Be sure to spread the butter in a very thin even layer. I found that if the butter layer was too thick it started to squish out through the layers making subsequent rolling a task.
5. Neatly fold over the unbuttered right third of the dough (using the pastry scraper to loosen it if it sticks), brush off any excess flour, then fold over the left third. Starting from the top, pat down the packet with your hand to release air bubbles, then pinch the edges closed. Brush off any excess flour.
6. Turn the dough packet 90 degrees to the left so the fold is facing you. Lift the packet and flour the work surface. Once again roll out to an 18-inch square, then dot and spread the left two-thirds of the dough with one-third of the butter, and fold the dough as in steps 4 and 5
7. For the last rolling, turn the packet 90 degrees to the left and roll out the dough to an 18-by-21-inch rectangle, with the shorter side facing you. I couldn’t get the dough thin enough here without it turning into a mess or ripping the dough. I’ll try again next time. Spread the remaining butter over the entire surface.
8. Using the spatula as an aid, lift the edge closest to you and roll the dough away from you into a tight log, brushing the excess flour from the underside as you go. Trim the ends and cut the log in half. Wrap each piece in plastic wrap and chill for 2 hours or preferably overnight.
Make the custard
9. In a medium bowl, whisk the flour and 1/4 cup of the milk until smooth. Set aside.
10. Bring the sugar, cinnamon, and water to a boil in a small saucepan and cook until an instant-read thermometer registers 220°F (100°C). Do not stir.
11. Meanwhile, in another small saucepan, scald the remaining 1 cup milk. Whisk the hot milk into the flour mixture.
12. Remove the cinnamon stick then pour the sugar syrup in a thin stream into the hot milk-and-flour mixture, whisking briskly. Add the vanilla and stir for a minute until very warm but not hot. Whisk in the yolks, strain the mixture into a bowl, cover with plastic wrap, and set aside. The custard will be watery at this point.
Assemble and bake the pastries
13. Heat the oven to 550°F (290°C). Remove a pastry log from the refrigerator and roll it back and forth on a lightly floured surface until it’s about an inch in diameter and 16 inches long. Cut it into scant 3/4-inch pieces. Place a piece cut-side down in each well of a nonstick 12-cup mini-muffin pan (2-by-5/8-inch size). Allow the dough pieces to soften several minutes until pliable.
14. Have a small cup of water nearby. Dip your thumbs into the water, then straight down into the middle of the dough spiral. Flatten it against the bottom of the cup to a thickness of about 1/8 inch, then smooth the dough up the sides and create a raised lip about 1/8 inch above the pan. The pastry sides should be thinner than the bottom.
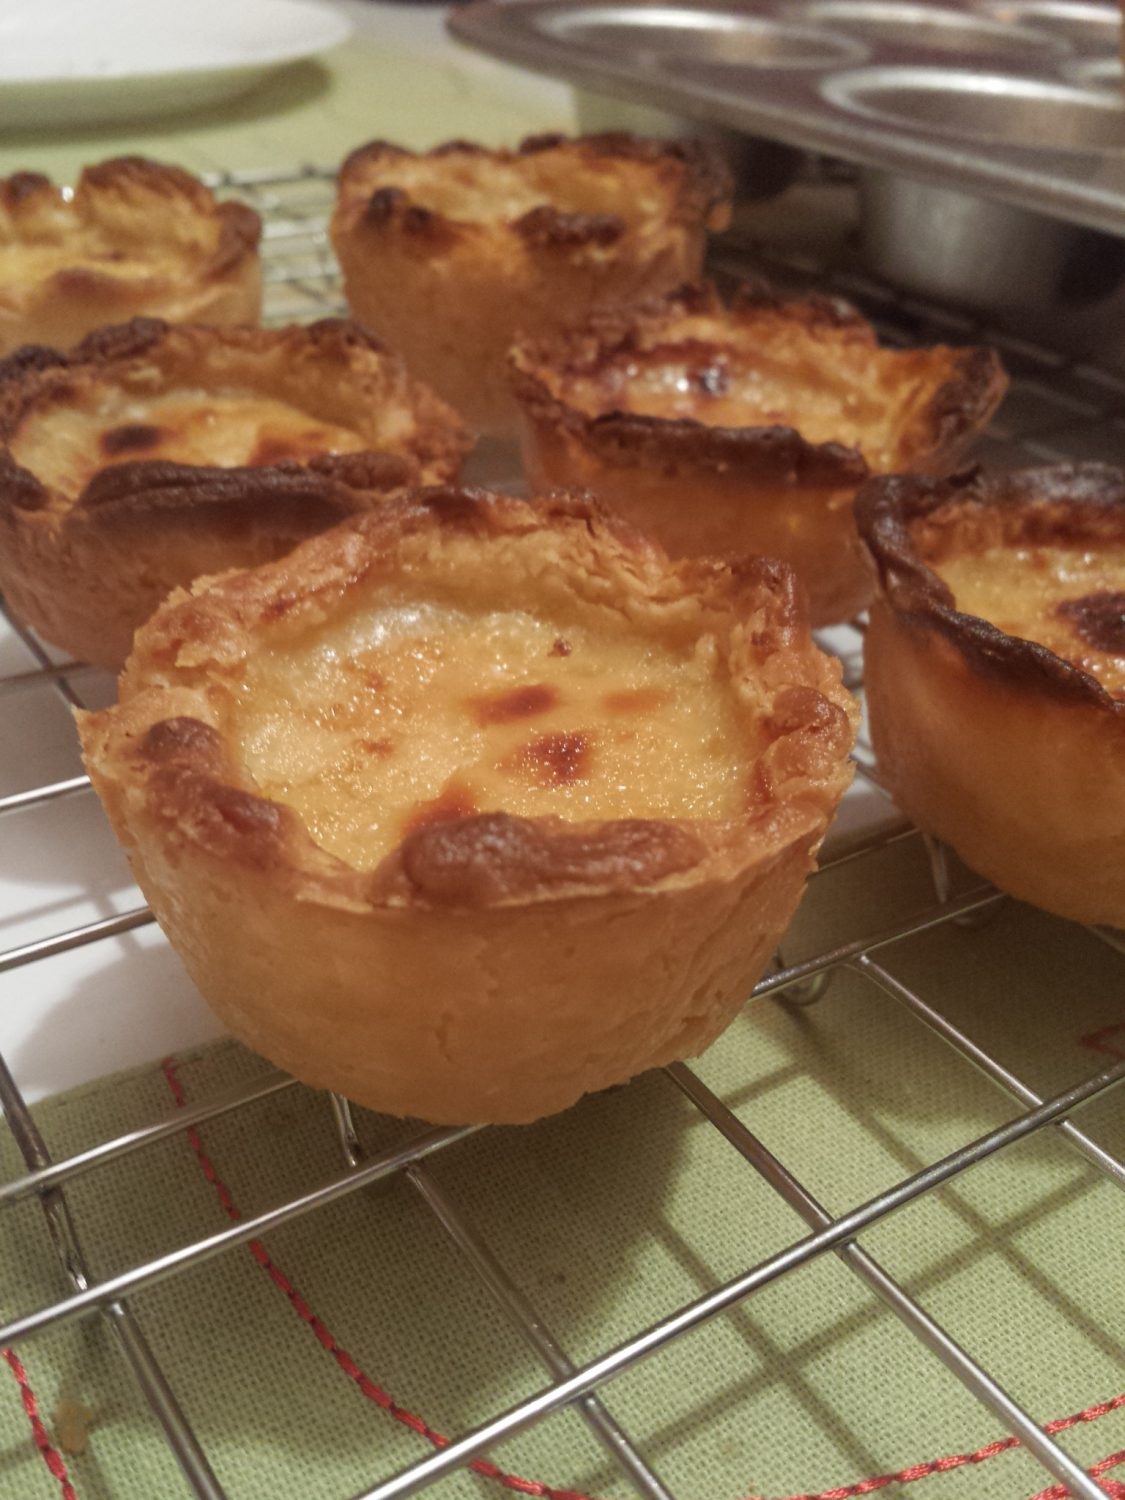
15. Fill each cup 3/4 full with the slightly warm custard. Bake the pasteis until the edges of the dough are frilled and brown, about 8 to 9 minutes. I baked mine at 260°C for about 12-14 mins until the custard starts to brown on top and the pastry is golden.
16. Remove from the oven and allow the pasteis to cool a few minutes in the pan, then transfer to a rack and cool until just warm. Sprinkle the pasteis generously with powdered sugar, then cinnamon and serve. Repeat with the remaining pastry and custard. If you prefer, the components can be refrigerated up to three days. The pastry can be frozen up to three months.
Comments
I found the custard to be too sweet so next time I’d cut down the sugar a little. Also I’ll add some lemon rind to the custard at the same time as the cinnamon stick to give it some citrus flavour.
The custard tarts were delicious! But they aren’t quite like the original. The dough was slightly too hard, not delicate. Perhaps I’ll try a different recipe next time or I’ll try to roll out the pastry a bit thinner to get those fine layers in.
If you’ve never tried a Pasteis de Nata I encourage you to try them. In the mean time I’m going to continue to try different recipes until I’m satisfied with the result.
Happy baking!


Chorizo & Co. at Fort St. has good pasteis de nata.